WP Responsive Recent Post Slider – WordPress Plugin

Responsive Post Slider Plugin
WP Responsive Recent Post Slider
WP Responsive Recent Post Slider is a plugin that will allow you to quickly add a post slider to your website. It includes touch support for mobile devices. They offer a free version that has 4 designs or you can upgrade to their Pro version for $19.95 for 1 website. This review will cover the free version only.
Installation
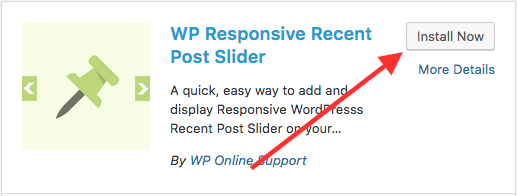
To install this plugin first login to your admin WordPress Page. On the left toolbar locate the Plugins section. Next select “Add New” and search for “WP Responsive Recent Post Slide”

It should be the first result or at least on the first page. Locate WP Responsive Recent Post Slide and click the “Install Now” button. After this completes it will need to be activated by clicking the “Activate” button. Note: This plugin will ask for consent on sending information about usage to help improve their plugin. You are not required to Opt-In and it has no effect on the functionality of the plugin if you don’t.

Setup WP Responsive Recent Post Slider
Now that the program is installed setup to use the slider is handled through Shortcode. Shortcode is small pieces of code that covers some sort of function usually from a plugin like WP Responsive Recent Post Slider. Don’t worry if you haven’t used Shortcode before we will walk through this process step by step.
- First find where you would like to place the slider at on your Page/Post and then you will want to click the “Text” tab so you can enter in the Shortcode. Note: It should work in the Visual editor as well, but to be sure enter the Shortcode in the “Text” section if it doesn’t display/work properly.

- Now that we are in the “Text” editor type in
 . Make sure the brackets “[ ]” are included.
- This example will use design-1 and place the image slider into your post and look similar to this example below. [recent_post_slider design=”design-1″]
- Lastly to make sure the photo appears in the slider this plugin pulls from the “Featured Image” that you have set for the post.
Other Options
There are additional options that can be added to this slider these are easily added by adding the option to the Shortcode.
- Arrows – On the bottom right there is a forward and back arrow. By default these are shown. If you would like to hide use this Example:

- Autoplay – Autoplay moves the slider to the next slide automatically. The default is set to true if you would like to stop it from auto playing we need to add autoplay”false” into the Shortcode.
- Autoplay Interval – This interval will set the speed that it advances to the next slide post. It has a default value of 100 and can be lowered to increase the speed or raised to decrease the speed. Example:

- Category – If you want your post to show from a specific category you can designate that by adding their category id. To locate the category check out How to Locate the Category ID. Example:
 , this will show post from category 5. If you would like to combine categories you can by placing a , in-between the categories like this category=”5,10″
 - Content Words Limit – Set the amount of words that are displayed from you post. The default is set to 20 words. To adjust add the amount. If you wanted it to display 25 words this would be the Example: content_words_limit=”25″
- Design – As mentioned above the free version offers 4 designs. To change the design you will input design=”design-1″, design=”design-2″, design=”design-3″ or design=”design-4″ these examples are posted below
- Dots – Shows or hides the dots on the bottom of the post slider. The default is set to “true” you can hide by adding dots=”false” into the short code.
- Hide Post – Hide post will hide a post based on it post id. To locate the post id follow How to Locate the Page ID. Once you have the page id just place the number after the hide_post. Example if you want to hide multiple posts :

- Limit – If you want to add a limit on how many posts are displayed you can add this or it will default to 8. Example :
 , this will limit it to 4 posts.
 - Post Type – If you have created custom post types they can be accessed with this command. Example: post_type=”yourcustomposttype”
- Show Author – Hide or show the author in the post slider. Example: show_author=”false”
- Show Category Name – You can show or hide the category name by a simple “true” to show or “false” will hide it. Example to hide the category name

- Show Content – You can show or hide the short content of a post using this command. The default value is “true”. You can hide with this Example:

- Show Date – Hide or show the date the post was created. Use show_date=”true” or show_date=”false” Example to hide date

- Show Read More – Show read more will display the read more button using either “true” or “false”. Example to show read more:


I located your web site from Google as well as I have to state
it was a terrific locate. Thanks!